
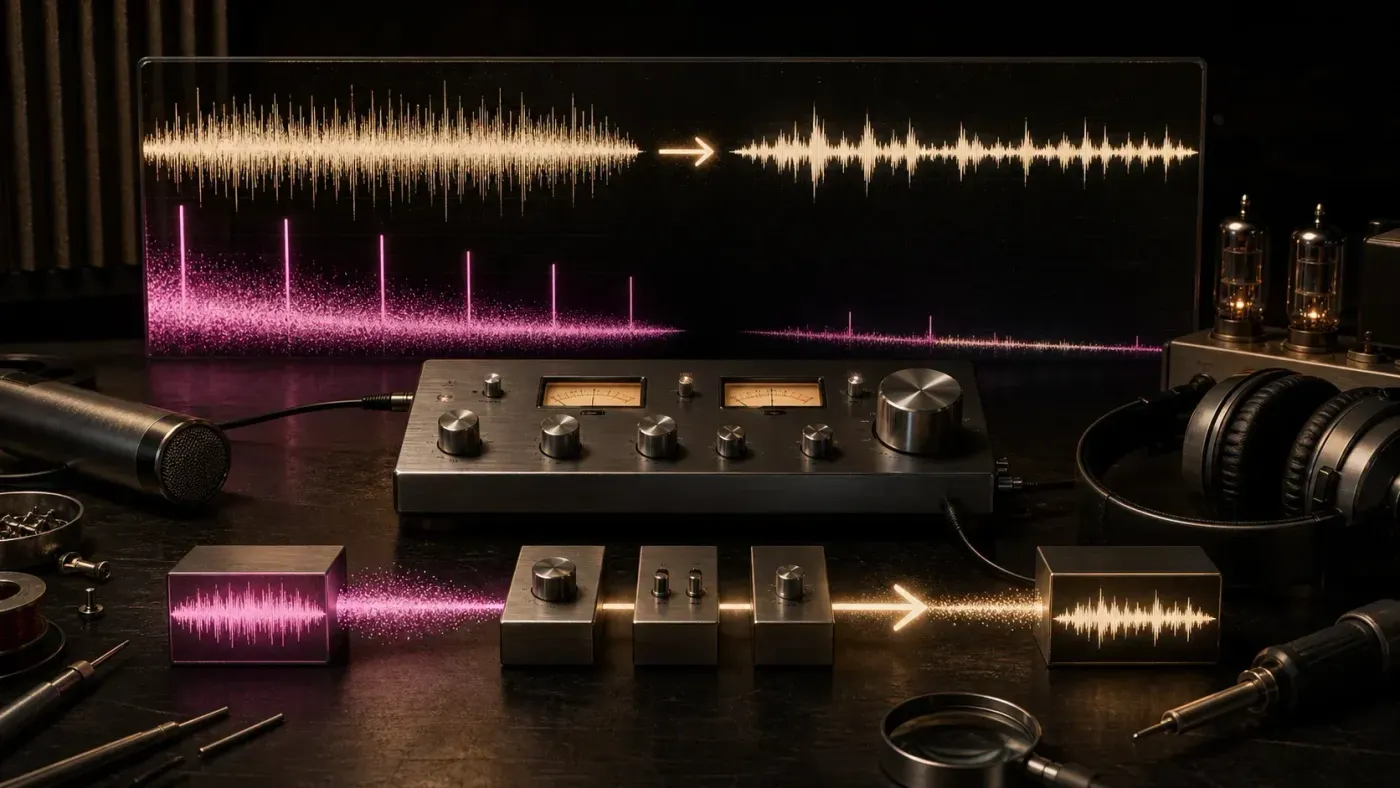
For an existing recording, treat hiss and hum separately. Use narrow EQ cuts or a de-hum processor such as RX De-hum for measured, stable hum lines; use Effects → DeHisser for the remaining steady broadband hiss. If your DeHisser has Absorption, Inverse and Reduction controls, check the removed signal with Inverse, then switch Inverse off before adjusting final Reduction. Compare the normal processed output with the original at similar loudness, and stop before consonants, attacks or fades become dull or watery.
If you can record another take, look for the noise in the recording chain first. Moving a cable or replacing a faulty connection may help more than processing every future file. Software repair can make an irreplaceable take more usable, but it cannot fix the hardware that produced the noise.
This Windows guide covers steady hiss and tonal hum in Sound Forge Pro. For changing fan or room noise, use the background-noise workflow; isolated impulses need the click-and-pop repair workflow. The Sound Forge restoration hub helps separate these problems when the recording contains more than one.
Documentation checked September 8, 2026. Menu paths follow Sound Forge Pro 2026 help; detailed DeHisser controls are cross-checked against the Sequoia 2026 reference and must match your installed dialog. This guide does not claim a hands-on test of your build or third-party plug-ins.
Identify the Noise Before Removing It
Listen to an exposed pause and a passage containing wanted audio. A waveform helps locate events in time; a spectrum helps distinguish a broad noise floor from narrow interference lines. Do not use the picture alone to decide what to remove. The illustrations below are schematic, not measured spectra or filter settings to copy.

| What you hear | What to look for | First tool | Main risk |
|---|---|---|---|
| Hiss | Broad, steady energy across many frequencies, often obvious in the upper mids and highs | DeHisser or noise-profile reduction | Dull consonants, cymbals and tape ambience |
| Hum | One narrow low-frequency line with evenly spaced harmonics | Narrow EQ cuts or dedicated De-hum | Removing bass fundamentals and body |
| Buzz | A stronger harmonic ladder that reaches higher than a soft hum | Several measured notches or De-hum | A hollow, comb-filtered result |
| Rumble | Broad low-frequency energy from handling, traffic, turntable or HVAC | High-pass filter, only as high as needed | Thinning a voice, kick, bass or piano |
| Variable fan or room noise | The spectrum and level change over time | Adaptive/spectral denoiser, automation, or re-recording | Underwater speech and moving artifacts |
| Clicks and crackle | Short impulses rather than a continuous floor | Click/pop repair | Smearing attacks if treated as hiss |
Don’t diagnose by name alone. “Static” may mean hiss, clipping, electrical buzz or intermittent digital crackle. “Hum” may have a weak 50/60 Hz fundamental but strong harmonics, with stronger lines near 100/120 Hz or higher. Measure them, then listen: a visible peak can also be a wanted note.
Fix Hiss and Hum at the Source First
Before changing a connection, stop playback and mute monitoring. Change one part of the recording chain at a time and keep the gain settings unchanged. A noise change after unplugging a source is a clue, not proof of where the fault lies: the connection and ground path have changed too. Substitute a known-good compatible cable or source where possible. Never remove a protective mains earth; Rane’s interconnection guidance explicitly says to keep the original factory grounding intact and leave wiring modifications to trained personnel.
For microphone connections, Shure recommends turning phantom power off before plugging or unplugging. Follow the mic and interface maker’s shutdown and discharge instructions, then restore the required power only after the connection is secure. Keep monitoring muted during the change.
- Move audio cables away from AC adapters, dimmers and power cables.
- Use balanced connections where the equipment supports them. Shure’s audio troubleshooting guide identifies unbalanced runs near power and lighting as a common hum pickup path.
- Test laptop power. Record briefly on battery with nonessential USB devices disconnected. If the noise changes, investigate the power or USB path rather than filtering every future take.
- Set gain at the right stage. Digital gain after capture raises the recorded noise as well as the voice; it does not improve that recording’s signal-to-noise ratio. Improve the wanted signal at capture while leaving headroom. Recording too hot creates clipping, which needs the separate clipped-audio repair workflow.
- For tape or vinyl, service the transfer chain. Use suitable, format-specific cleaning and check the playback path before capture. Leave alignment or work on fragile media to a qualified transfer specialist. Post-processing should not compensate for a preventable transfer fault.
Save a short recording of the normal setup, then repeat with one known-good compatible cable or source substituted. Test battery operation or a nonessential USB connection separately, keeping monitoring muted while reconnecting. Record long enough to capture the recurring noise. These comparisons narrow the search; they do not establish a universal diagnosis. Shure’s examples of hum and interference include microphone pickup of a nearby AC hum field, so consider placement as well as cables. In the diagram below, ten seconds is an example, not a required test duration. Its unplugging step does not mean defeating a safety earth or reconnecting a live microphone.

If the clean comparison depends on input gain, driver mode, or monitoring, repeat it with the Sound Forge recording setup checklist. If the input is silent or refuses to arm, solve the Sound Forge recording fault before judging the noise floor.
Prepare a Safe Restoration Session
- Keep the original capture. For a PCM capture, retain its sample rate and precision in a lossless working copy. For an MP3 source, decode once to a PCM or float working file; MP3 has no original PCM bit depth to preserve. Never denoise an MP3 and overwrite the only source.
- Mark three test regions. Use a quiet passage, a dense or loud passage, and a fade or word ending. One setting must survive all three.
- Protect true silence and wanted room tone. A noise-only passage is useful for analysis, but deleting every pause can make edits pump or expose hard cuts.
- Make one change at a time. Hum notch, hiss reduction, gate and compression should be auditioned separately before they become a chain.
- Level-match bypass. The quieter version often seems cleaner. Match output level closely enough that the decision is about damage, not loudness.
For a repeatable non-destructive chain, the current Sound Forge Plug-In Chainer guide explains how to order, bypass and save processors.
Saving a chain preserves processor settings, not every destructive edit. Keep the source media and save the working FRG project where appropriate; render the processed delivery to a new file. Do not overwrite the only capture simply because the chain itself can be bypassed.
Nine-step restoration checklist
Use this checklist as a repeatable pass before committing a repair:
- Keep the original. Keep the untouched source and a lossless PCM or float working copy at its sample rate; avoid repeated lossy exports.
- Mark test regions. Choose a quiet passage, a dense passage, and a fade or word ending.
- Identify the noise. Separate broad hiss, narrow hum, low rumble, variable room noise, and isolated clicks.
- Measure the spectrum. Locate the actual hum fundamental and audible harmonics instead of entering a regional preset blindly.
- Reduce stable hum. Cut only measured interference lines with narrow EQ or a dedicated de-hum processor.
- Open DeHisser. Choose Effects → DeHisser for the remaining uniform broadband hiss.
- Set Absorption with Inverse. Back off when words, transients, music, or ambience appear in the removed signal.
- Lower final Reduction. Switch Inverse off first: Reduction has no effect while Inverse is active. Adjust the normal output until speech, attacks and fades remain natural.
- Verify the complete file. Compare bypass at similar loudness and recheck every marked region. Turn Inverse and Bypass off before applying; save and audition a new output file.
Measure the Noise with Spectrum Analysis
- Select a short section where the noise is exposed but representative.
- Open View → Spectrum Analysis.
- Look first below roughly 500 Hz for narrow stable lines, then scan the full range for a broad floor.
- Move the cursor to the lowest stable peak and note its actual frequency.
- Check whether additional peaks repeat at integer multiples.
- Select a second section and click Refresh, or enable Auto Refresh. If the interference peaks move, a fixed notch may miss them; wider cuts can damage more wanted audio.
The current Sound Forge Spectrum Analysis help describes the view as amplitude by frequency rather than amplitude by time. Boris FX also recommends a manageable selection in the Spectrum Graph workflow; a very long selection takes longer and hides time variation. The full Spectrum Analysis guide covers FFT size, windowing and cursor readouts when the peak is hard to isolate.
Use the spectrum to locate, then your ears to decide. A visible line isn't automatically objectionable; the same frequency can belong to a bass note, vocal fundamental, transformer hum or room mode. A/B the proposed cut on the most exposed and most musically important sections.
Remove 50/60 Hz Hum and Harmonic Buzz
To remove hum from audio safely, begin with the measured fundamental. In many systems, mains-related noise starts near 50 Hz or 60 Hz and repeats at integer multiples. Treat that as a hypothesis rather than a preset: a transfer may contain drift, or a harmonic may be stronger than the fundamental. Measure the actual frequency before entering a number.
Method 1: narrow cuts with Modern Equalizer
- Select a representative test passage. Open FX Plug-Ins → Apply Plug-In Chain and add Modern Equalizer to an otherwise empty test chain.
- Add a peaking band at the measured fundamental.
- Increase Q to narrow the peaking band and lower Gain only until the interference is no longer distracting. Check for ringing as well as lost tone.
- Add a second band only when the next harmonic is clearly visible and audible.
- Toggle Bypass to compare the original and processed signal. If the processed version loses body or weakens a wanted note, reduce the cut; a narrower band is useful only if it still catches the hum without objectionable ringing.
- Preview before applying. A fixed notch is appropriate only while the interference stays put. Undo any rendered test before processing a larger region that includes it, then save the result separately.
The Sound Forge Pro 2026 Modern Equalizer help documents up to eight bands, peaking filters and Frequency, Gain and Q controls. A/B stores two settings; Bypass compares with no EQ. The Apply Plug-In Chain instructions explain selection-based preview and application. Start with only the proven interference lines. Narrower bands also have a ringing tradeoff, so check note attacks rather than increasing Q indefinitely.
Method 2: a dedicated De-hum plug-in
For a long or changing harmonic pattern, consider a dedicated processor rather than adding more manual cuts. The RX 12 De-hum manual distinguishes Static mode for simpler tonal hum from Dynamic mode for complex buzz. Adaptive tracking follows changes over time; iZotope says Dynamic Adaptive plug-in processing is not optimized for real-time use and should be used offline. De-hum is available in Elements, Standard and Advanced, but Elements supplies it only as a plug-in.
Sound Forge advertises VST3 support, and the RX 12 requirements list 64-bit VST3. That is not a tested-host guarantee: Sound Forge is absent from iZotope’s confirmed host list. Check the actual RX license and test scanning, preview, saved settings and rendering on a copy before depending on it. The Sound Forge Repair help refers to included RX plug-ins, but that general statement does not establish what your purchase contains. A standalone fallback needs Standard, Advanced or a trial that includes the editor; Elements alone does not provide it.
Remove Broadband Hiss with Sound Forge DeHisser
DeHisser is for steady low-level broadband noise such as tape, microphone, preamp or converter hiss. It doesn't need a captured noise sample. In the current Sound Forge help, open it at Effects → DeHisser.
The controls in this sequence are documented in Sequoia 2026’s DeHisser reference. Sound Forge’s public page directs detailed questions to the dialog’s ? help. Use the sequence only if that installed dialog exposes the same controls; if it differs, follow its own help rather than inferring identical behavior from a shared effect name.
- Select the hardest passage. Start with a quiet phrase, exposed sustain or fade where hiss competes with wanted detail.
- Open Effects → DeHisser. The current Sound Forge DeHisser page confirms the effect and path.
- Raise Reduction temporarily. This makes the Absorption boundary easier to hear; it is not the final setting.
- Increase Absorption slowly. Stop when the hiss is controlled but consonants, cymbals, pick attack and room tone remain intact.
- Enable Inverse. You should hear mostly noise. If you can identify words, melody, transients or reverb, back Absorption down.
- Turn Inverse off, then lower Reduction. Reduction has no influence in Inverse mode. Adjust it while listening to the normal processed signal, leaving enough residual noise to preserve wanted detail.
- Check the other marked regions. A setting that works in a pause may chew into a loud, bright section or make a fade chirp.
- Compare bypass at matched level. When the normal output is better, turn Inverse and Bypass off and apply once. Save to a new file and listen again. Undo a rendered test before processing an overlapping larger region.
The Sequoia 2026 DeHisser control reference gives a Reduction range of 0–30 dB and warns about loss of brightness, phase-like distortion and chirping at excessive Absorption settings. It also explicitly states that Reduction has no effect while Inverse is active. The maximum is not a recommended cleanup target; quiet fades often need less suppression.
Overlap increases the overlap between analysis windows; higher values cost more processing power. Resolution changes the internal analysis resolution, and the reference cautions that higher is not automatically better. Leave these alone until the basic settings work, then change one at a time and compare the same passage.
When to Use a Noise Profile or Adaptive Denoiser
DeHisser targets uniform hiss without learning a noise sample. A profile-based denoiser is worth testing when a noise-only passage captures the same steady fan or room bed as the wanted audio. For a narrow camera whine, first consider a measured notch. When the noise changes, adaptive processing or local edits may help, but neither guarantees clean separation from speech.
- Find a noise-only region from the same recording setup.
- Capture the profile from a representative section; do not duplicate one tiny block to make it “longer.”
- Apply a conservative pass to a copy or short test selection.
- Listen to the residue or removed signal.
- Lower sensitivity or reduction when wanted speech or music appears in the residue.
- Before trying a second pass, save the first result separately. Compare both with the original; keep the second only if its extra cleanup is worth any added damage.
The Audacity Noise Reduction manual provides a free profile-based alternative, not a Sound Forge menu path. It explains why the profile must contain noise alone and warns that excessive reduction creates metallic or watery artifacts. Audacity’s Noise only output is a diagnostic mode: undo that test before rendering the normal cleaned version.
Use a Different Workflow for Voice, Tape, Vinyl, and Music
Voice, podcast, and interview
Protect consonants and word endings. Reduce stable hum first, then apply light hiss reduction while checking S, F and SH sounds. A gate can lower noise between phrases, but it cannot remove hiss under speech. If the room noise rises and falls with every word, ease the denoiser and use clip gain or automation on pauses instead of forcing the gate. The voice-over recording workflow covers the capture side before cleanup.
Cassette and reel-to-reel transfer
Keep the untouched tape transfer. Before capture, check the playback speed, head condition and alignment, and any documented noise-reduction encoding. IASA’s tape noise-reduction guidance explains that encoded tapes need the matching, correctly aligned decoder; decoding and later hiss suppression are different operations. Do not guess at Dolby or dbx settings to make the spectrum look quieter. If the recording is valuable and its playback requirements are uncertain, get specialist help before further handling.
Sample the noise near the material you are repairing because the tape noise can change across a reel or cassette. Preserve a little stable tape bed when removing it completely would erase ambience or cymbal tails.
Vinyl transfer
Fix grounding hum before capture, then remove isolated clicks and large pops before broadband reduction so they don't distort the noise estimate. Follow the complete Sound Forge vinyl-restoration workflow for cleaning, capture, click repair, hum, rumble and final sides.
Music or stereo master
Be cautious with narrow notches on bass notes and with hiss reduction on cymbals, strings and reverb. Process mid and side channels separately only when the evidence supports it; otherwise channel-selective work can shift the stereo image. If the noise is part of an already limited master, a small residual may be less audible than the damage caused by another aggressive process.
A Safe Processing Order

The diagram’s noise-sample step applies to a profile-based denoiser, not DeHisser. Its caption describes an ideal: perfect separation is not guaranteed. Use residue listening to spot damage, then judge the normal processed output in context. A trace of wanted content in the removed signal may be an acceptable compromise, but clearly damaged words, attacks or fades are a reason to back off.
| Order | Problem | Why it comes here | Verification |
|---|---|---|---|
| 1 | Source and transfer faults | Prevents more contaminated audio and may eliminate the need for processing | Short comparison recordings |
| 2 | Severe clicks or isolated events | Prevents impulses from confusing broadband analysis | Attack and transient check |
| 3 | Stable hum or whistle | Narrow correction removes specific lines before broadband modeling | Analyzer plus bypass |
| 4 | Broadband hiss or room bed | Works on the remaining stationary floor | Inverse/residue and fades |
| 5 | Gate or pause automation | Cleans exposed gaps after the continuous noise is controlled | Phrase starts and endings |
| 6 | EQ, compression, mastering | These can exaggerate residual noise and should follow repair | Full-file A/B at matched level |
This order is a strong default rather than a law. A high-pass filter may be needed before a processor that reacts badly to subsonic rumble, and a click buried under heavy noise may be easier to expose after a light denoise pass. Make the exception on a copy and keep it only when the full-file A/B proves it.
Fix Metallic, Watery, or Hollow Artifacts
| Artifact | Likely cause | First correction |
|---|---|---|
| Metallic or “tinkly” noise | Noise model is wrong or reduction/sensitivity is too aggressive | For profile-based noise reduction, choose a representative noise-only sample; reduce the processing strength |
| Underwater speech | Changing noise overlaps the voice and the model is tracking both | Use less adaptive reduction; automate pauses; consider re-recording |
| Dull S sounds and cymbals | DeHisser Absorption is crossing into wanted high-frequency detail | Lower Absorption and check Inverse; switch Inverse off before adjusting final Reduction |
| Thin voice or missing bass note | Hum notch or high-pass filter is too wide or too high | Narrow the band, reduce the cut, or use a dedicated harmonic tracker |
| Hollow/phasey music | Too many harmonic notches or overprocessing in multiple stages | Remove unproven bands and rebuild from the fundamental |
| Pumping between phrases | Gate threshold/release or changing denoiser gain | Slow the transition, reduce range, or use manual clip gain |
Don’t judge a restoration at an exaggerated headphone level only. Compare quietly and at normal listening level through speakers and headphones. A faint noise floor that disappears in context may be finished, while an artifact that follows every syllable will stay distracting after export.
When Not to Remove All the Noise
Stop processing when the residual noise is less distracting than the side effects. Re-record when the performance can be repeated and the source problem is fixable. If the recording is archival, unique or historically important, preserve the original. For a badly contaminated one-off recording, create two deliverables if useful: a conservative archival master and a more aggressive listening copy.
When a unique recording needs spectral reconstruction beyond these file-level tools, compare dedicated audio restoration software before stacking more broad processing in Sound Forge.
When noise overlaps wanted sound, reducing one may damage the other. AI-assisted restoration can estimate a cleaner signal, but the result still needs listening checks. Do not promise lossless separation or approve a file simply because its noise floor is lower.
Remove Hiss and Hum FAQ
Where is DeHisser in Sound Forge?
In the current Sound Forge help, choose Effects → DeHisser. If it is missing, verify the installed edition and plug-in state instead of following a Sony- or MAGIX-era screenshot.
Should I remove hiss or hum first?
Remove stable hum first. Narrow notches or a dedicated de-hum processor can reduce specific tones before broadband hiss reduction analyzes the remaining floor. Reverse the order only when a controlled A/B on a copy clearly preserves more wanted audio.
Is electrical hum always exactly 50 or 60 Hz?
No. Those are common mains-related starting points, but the strongest recorded line may be shifted or appear at 100/120 Hz and higher harmonics. Measure the actual spectrum rather than entering a regional preset blindly.
How much hiss reduction should I use?
Use the least reduction that makes the hiss non-distracting; no dB setting is safe for every recording. With the DeHisser controls described here, use Inverse to check what is being removed, then turn it off before adjusting Reduction. Judge the normal output on words, transients and fades, not the residue alone.
Can a noise gate remove hiss?
A gate can lower hiss during pauses, but it does not remove hiss while speech or music is above the threshold. Use it after continuous-noise repair and keep the range and release natural enough that phrase edges do not pump. The Sound Forge noise-gate guide covers threshold, attack and release without pretending a gate is broadband audio noise reduction.
Why does cleaned audio sound metallic or underwater?
The processing may be removing wanted audio or following a changing noise floor too aggressively. With profile-based reduction, check the noise-only sample and reduce sensitivity or strength. With DeHisser, revisit Absorption, then switch Inverse off to adjust final Reduction. Compare the normal output with the original; if the voice is buried in noise, a new recording may be the only satisfactory option.
Can EQ remove 50/60 Hz hum?
Yes, for stable interference at a few measured frequencies. Try narrow peaking cuts at the audible hum lines and compare the musical content as well. A dedicated processor offers more options for a long or drifting harmonic pattern, but it still needs a test: neither notches nor adaptive tracking are automatically harmless.
Can iZotope RX De-hum run in Sound Forge?
Treat it as an unconfirmed host combination. RX 12 supplies 64-bit VST3 plug-ins and Sound Forge supports VST3, but iZotope does not list Sound Forge among its confirmed RX 12 hosts. Verify your RX license, then test scanning, opening, preview, saved settings and rendering on a copy. Dynamic Adaptive De-hum is intended for offline plug-in use. If you need a standalone fallback, use Standard, Advanced or an editor-enabled trial; Elements alone is plug-in-only.