
Quick answer: save a separate working copy, select the audio you intend to process, and choose Process > Auto Trim/Crop. Choose the function first: trimming selection edges, deleting gaps between phrases, and limiting file length are different operations. Remove silence between phrases (creates regions) deletes detected silence while creating regions. Use it only when those gaps should disappear.
Start with a short test that includes the quietest wanted sound and the longest decay. Set thresholds from that recording, inspect the result, and return to the unprocessed copy before trying different settings. A tidy Regions List cannot tell you whether a consonant or an intentional pause was lost.
Choose the function before setting thresholds
The Sound Forge 2026 Auto Trim/Crop help lists these five functions. The first two differ in what happens outside your selection.
| Function | What it removes | Check before applying |
|---|---|---|
| Keep edges outside of the selection | Silence between the selection boundaries and the detected sound. Data outside the selection stays. | The selection includes the wanted attack and tail. |
| Remove edges outside of the selection | The same edge silence, plus everything outside the selection. | Other takes outside the selection can be deleted. |
| Remove silence between phrases (creates regions) | Detected silence between phrases inside the selection; it also creates regions. | You actually want to delete the gaps, not just mark them. |
| Remove data beyond loop points | Data after the selected loop, subject to the minimum length following loop end setting. | The target sampler's requirements for samples after the loop. |
| Remove data from start and limit file length | A specified amount at the beginning; it also trims files that exceed the maximum length. | The removed start or end may contain wanted audio. |
For one hand-placed crop, use the manual cut and trim workflow. This guide covers level-detected trimming. The Core Editing guides connect both approaches with recording and export.
Measure the noise floor and the quietest wanted sound
Compare a noise-only passage with the quietest sound you need to keep. Use the meters or Statistics to inspect peak and RMS levels; waveform height alone is a poor guide when the display is zoomed. Do not include a breath or a reverb tail in your noise sample if it belongs in the edit.
A useful detection threshold must distinguish those two cases. If speech and background overlap in level, raising the threshold can remove speech along with the noise. If room tone changes halfway through the recording, test that section separately. There is no universal dB setting that preserves every voice, microphone distance, and room.
Attack and release are level thresholds, not timing controls
Attack threshold detects the trim/crop start point. Release threshold detects the end point. The current help defines -Inf. as complete silence and 0 dB as maximum amplitude. These controls specify detection levels, not an attack time or release time in milliseconds.
A lower attack threshold can retain a quieter onset, but may also detect background. A lower release threshold can retain more decay, provided the decay remains distinguishable from the noise. Try changes on the original test copy and listen to the whole phrase. Neither setting understands words or musical phrasing.
Do not assume attack and release must match. Choose each from the sound it needs to detect. If no pair separates wanted audio from the background reliably, place the boundaries manually instead of forcing a more aggressive preset.
Use fades to check edges, not repair missing audio
Fade in and Fade out set fade lengths associated with the detected start and end points. The Auto Trim/Crop help describes them as protection against glitches at phrase boundaries. They are separate from the level thresholds.
A fade cannot reconstruct a deleted consonant. Return to the unprocessed copy if an attack is missing, correct the selection or detection, and then check the fade. An unnecessarily long fade can soften a transient that survived the trim. Use only as much fade as the particular boundary needs; do not copy a fixed duration across unlike sounds.
For a deliberate musical entrance or ending, finish the trim first and use the separate fade-in and fade-out workflow. Automatic edge treatment and a creative song fade solve different problems.
Test a short selection before the whole recording
- Save a separate lossless working copy and keep the source untouched.
- Listen to the source and compare noise-only audio with the quietest wanted attack and longest tail.
- Select a short representative range. Check its start, end, and selected channels before processing.
- Open Process > Auto Trim/Crop and choose the function whose deletion behavior matches the job.
- Set attack and release thresholds from the source. Set short edge fades; for phrase mode, also set minimum inter-phrase silence.
- Preview the selection and compare with Bypass. Then apply the operation to the working copy with OK.
- Inspect the changed waveform, retained audio, and any regions. Listen to complete phrases and both sides of every new boundary.
- If the result fails, return to the unprocessed copy before changing settings. Process a larger range only after the test preserves the wanted audio.
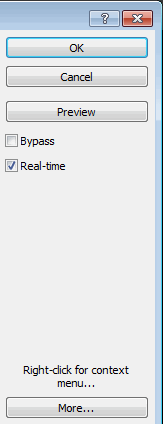
The official processing-dialog guide documents Preview, Bypass, OK, and Cancel. Preview is an audition aid; inspect the applied result as well, especially when the operation changes file length or creates regions. Cancel closes the dialog without applying its settings.
Delete gaps and create regions, or preserve the recording?
Choose Remove silence between phrases (creates regions) for separated takes or effects only when deleting the intervening gaps is intentional. Minimum inter-phrase silence specifies how much silence must exist before a new region is created. It is not a promise to leave that amount of room tone in the output.
Increase that minimum if short pauses inside a phrase are producing extra regions. If adjacent takes become one region, inspect whether their gap meets the setting and whether the noise prevents reliable detection. Count the results and audition each region; a plausible count does not guarantee correct edges.
If the gaps must remain in the source audio, Tools > Auto Region creates regions from attacks or musical intervals rather than performing this silence-deletion operation. It has different controls: attack/release sensitivity, minimum level, and minimum beat duration. Do not transfer Auto Trim/Crop threshold values as though the two dialogs were interchangeable.
Auto Region's Use release point for end of region option can exclude a quiet gap from a region without deleting the gap from the source. Regions are created when you apply the dialog; they are not merely suggestions waiting for an approval button. Inspect their boundaries before using them.
Use the markers and regions guide to name and adjust regions. When you need separate files, follow the reviewed-region extraction workflow. Creating regions and exporting separate files are separate steps.
Troubleshoot the changed audio
- The first consonant is missing: reopen the unprocessed test copy. Check whether the selection excluded it, whether detection started too late, or whether the fade softened an intact attack. Lower the attack threshold only if late detection is the cause.
- A tail ends abruptly: test a lower release threshold on the source copy. If the retained edge is correct but clicks, review the fade instead. Trim manually when the tail cannot be separated from the noise.
- Too many small regions: inspect internal pauses and minimum inter-phrase silence. A noise spike can also create an unwanted event; duration alone will not fix every false detection.
- A quiet phrase disappears: compare its level with the threshold and the background. Try a more suitable setting for that section, or mark it manually.
- Speech sounds rushed: restore the pauses from the original. Phrase mode is inappropriate when the gap itself carries timing or room ambience.
Continuous applause, changing wind, surface noise, overlapping dialogue, and long musical decays need editorial judgment. When reviewing automatic boundaries takes more work than placing them, use manual trimming. No automated region count replaces listening.
Loop tails and fixed-length clips
With Remove data beyond loop points, Minimum length following loop end is a count of samples to retain after the loop. The help explains that some samplers do not use the exact supplied loop points. Check the intended sampler rather than assuming zero extra samples is safe. This setting is not the same as a fade-out duration.
Remove data from start and limit file length removes the specified opening portion and caps the converted file length. It can cut wanted sound, not just silence. The maximum is a limit, not a promise to pad a shorter file to an exact duration. Check the start and ending of every resulting clip.
Reuse settings only on comparable sources
A preset records settings, not an editorial decision. Before reusing one, test the quietest onset, loudest background, shortest intended gap, and longest decay among the files. Divide inconsistent recordings into separate groups or edit them individually.
Record the function and the controls relevant to that function. Keep output separate from the originals. The Batch Converter guide covers the larger multi-file workflow; do not assume a preset that worked on one take is safe for an entire folder.
Before delivery, listen to every exported boundary, verify the intended file order and region names, and reopen the saved files. Compare with the untouched source when a beginning, ending, or pause sounds wrong.
Auto Trim/Crop FAQ
Where is Auto Trim/Crop in Sound Forge?
Open Process > Auto Trim/Crop. Choose the function first, then adjust the controls relevant to it. Check the selected audio and channels before applying a destructive operation.
Why does Auto Trim/Crop cut off the first word?
The selection may exclude it, the attack threshold may miss a quiet consonant, or a long fade may soften an intact onset. Return to the original test copy, identify the cause, and adjust selection, detection, or fade separately.
Can Auto Trim/Crop split multiple takes?
Remove silence between phrases (creates regions) deletes detected gaps and creates regions. It does not export separate files by itself. Review the regions before extraction; use Auto Region instead when the source gaps must remain.
Should attack and release thresholds match?
Not necessarily. Attack detects the start and release detects the end. Set each from the source's quietest wanted attack, decay, and background level rather than assuming one shared value.
Does minimum inter-phrase silence preserve a pause?
No. It sets the minimum silence required before a new region is created. Phrase mode deletes detected silence; the setting is not a retained-pause duration.
Does Auto Trim/Crop replace a noise gate?
No. Auto Trim/Crop removes data according to its selected function and can create regions. It is not continuous background attenuation inside retained phrases. Choose manual editing when deleting gaps would damage the recording's timing.
Documentation checked September 14, 2026 against the Boris FX Sound Forge 2026 Auto Trim/Crop, Auto Region, and processing-dialog help. This is a documentation-led workflow, not a report of a newly performed Windows application or listening test.