

Use Ctrl+X when you want to remove the selected audio and keep it on the clipboard. With waveform focus and Treat as Cutlist off, press Delete to remove it without replacing the clipboard. Use Ctrl+T when the selection is the part you want to keep and everything outside it should go.
Those three commands solve different jobs. In Sound Forge, Trim/Crop means keeping the selected range and removing the audio before and after it; Cut and Delete do the opposite by removing the selection itself. The table below is the short version; the rest of this guide covers precise selections, zero crossings, automatic silence removal, multichannel files and event-based editing in Sound Forge Pro 2026.
| Command | Shortcut | What remains | Clipboard |
|---|---|---|---|
| Edit → Cut | Ctrl+X | Audio outside the selection | Selected audio replaces the previous clipboard contents |
| Edit → Delete (Clear) | Delete | Audio outside the selection | Unchanged |
| Edit → Trim/Crop | Ctrl+T | Only the selected audio | Unchanged |
For a clean manual edit, work in this order. Use the default shortcuts with the waveform window focused (Alt+0); if you changed the mapping, use the named menus. The defaults are listed in the current Boris FX keyboard map.
- Select the Edit tool. Use the regular waveform-editing tool, not the Event tool.
- Select the audio. Drag over the range you want to remove or keep, including every channel that should change.
- Set exact boundaries. Check Selection Start, End and Length; type a value when the edit must land at an exact time.
- Check zero crossings. Use Z or Shift+Z when moving an edge to a zero crossing will reduce click risk.
- Choose the correct edit. Use Ctrl+X to cut, Delete to clear or Ctrl+T to keep only the selection.
- Listen and save safely. Audition the join in context, undo or fade if it clicks, then use Save As when the source must remain untouched.
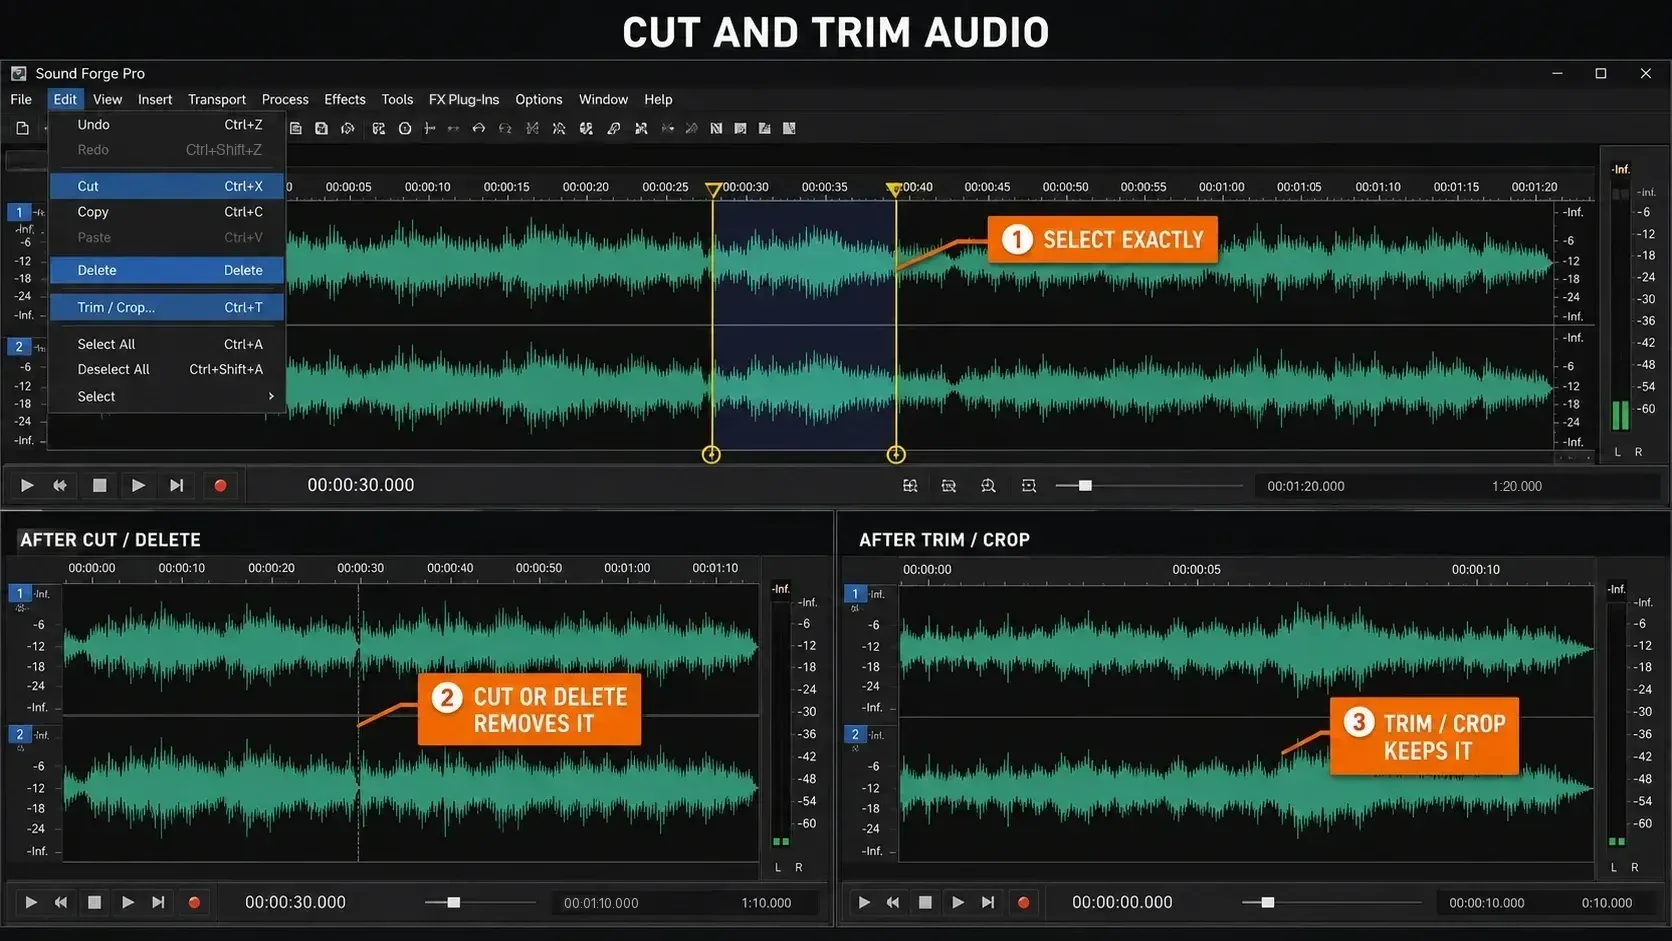
Make a precise selection first
- Select the Edit tool.
- Click and drag across the waveform to mark the audio you want to remove or keep.
- Check Selection Start, End and Length in the selection status bar.
- Double-click a status-bar field when you need to type an exact time value.
- Zoom in and move the edges before committing the edit.
The current Boris FX selection reference confirms that Selection Start moves the cursor when no range exists, while Selection End or Length can define and edit a selection. Right-click the status area to choose the time format that fits the job: time, samples, frames or another available ruler format.
For stereo and multichannel files, dragging inside one channel selects only that channel. Drag across channels, or along the divider/loop bar, to select more than one. The 2026 mouse-selection guide also documents Ctrl+click for adding or removing a channel from the selection and the Lock Channel Selection button for preserving the channel set while changing the time range.
Cut: remove the selection and keep it
Choose Edit → Cut or press Ctrl+X. Sound Forge removes the selected sound data and copies it to the clipboard, replacing whatever was there before. You can then position the cursor and press Ctrl+V to paste it, or Ctrl+E to paste it into a new data window.
Cut is the right choice when you might reuse the removed section. If you just want it gone, I'd use Delete, since it leaves the existing clipboard alone. The official Cut documentation also spells out an easily missed multichannel behavior: cutting data from an individual channel leaves silence at the end of that channel, because every channel in the file must remain the same length.
Delete/Clear: remove it without touching the clipboard
Select the unwanted audio and press Delete, or choose Edit → Delete (Clear). The selection disappears without being copied anywhere, which makes this the cleanest command for a cough, a false start or a dead section you won't paste back in.
There's one special case. If Edit → Playlist/Cutlist → Treat as Cutlist is enabled, Delete creates a Cutlist region instead of removing the selection. If Delete seems to do nothing to the waveform, check that mode before troubleshooting the keyboard. That behavior and the same individual-channel end-silence rule are documented on the current Delete/Clear help page.
Trim/Crop: keep the selection and discard the outside
Highlight the audio you want to keep, then choose Edit → Trim/Crop or press Ctrl+T. Sound Forge removes everything outside the selection from the selected channel, and nothing goes to the clipboard.
This is the fastest manual way to remove lead-in and tail material from a recording: select from the intended start to the intended finish, listen across both boundaries, and crop. The exact selected-channel scope comes from the Sound Forge Pro 2026 Trim/Crop reference. On a stereo or multichannel file, deliberately select every channel when you want one coherent start and end; don't assume a single-channel selection will crop the whole file.
If the kept audio starts or ends abruptly, undo and move the boundary. If the edge still sounds abrupt, select a short edge region. The current linear Fade commands are Process → Fade → In and Process → Fade → Out, and Process → Fade → Graphic lets you shape the curve. The right length depends on the source, so keep the initial transient and the natural final decay instead of using one fixed value on every file.
Prevent clicks at edit points
A jump between the samples on either side of a cut can cause a click. Editing close to a zero crossing lowers that risk, but a point that looks quiet isn't automatically a zero crossing.
- Press Z for Edit → Selection → Snap to Zero, which moves both selection edges.
- Press Shift+Z for Snap Edge to Zero, which moves only the active edge.
- For automatic snapping, check both Options → Snapping → Enable and Options → Snapping → Zero Crossings. F8 and Ctrl+B toggle those settings, so don't hit them blindly when the options are already on.
- Use Home or End to change the active selection edge before an edge-only snap.
The current Enable Snapping help distinguishes automatic snapping from the manual Z and Shift+Z commands. Automatic snapping requires Enable to be checked; the manual commands move the selection edges when you invoke them. The Editing preferences let you choose positive, negative or any zero crossing. The current Selection Snapping documentation uses the names “Snap to Zero” and “Snap Edge to Zero.” Snapping reduces click risk, but it can't guarantee that two unrelated waveform shapes will join invisibly. Listen across the edit and use a short fade or event crossfade when needed.
Auto Trim/Crop: remove silence by detection
Choose Process → Auto Trim/Crop when you'd rather have the edit detected from level than place it by hand. It's handy for repeated recordings with similar silence and noise, but it needs a threshold that separates the quietest sound you want from the unwanted floor.
The 2026 dialog has five functions; there's no single generic “remove silence” mode:
| Function | What it does |
|---|---|
| Keep edges outside of the selection | Deletes silence between the selection boundaries and detected sound, but keeps data outside the selection |
| Remove edges outside of the selection | Deletes that silence and also deletes everything outside the selection |
| Remove silence between phrases (creates regions) | Deletes qualifying silence inside the selection and creates regions between phrases |
| Remove data beyond loop points | Deletes material after a selected loop while retaining the specified minimum samples after the loop end |
| Remove data from start and limit file length | Deletes a specified amount from the start and caps the converted file length |
Attack threshold detects the start; Release threshold detects the end. Fade In and Fade Out protect the detected phrase boundaries, while Minimum inter-phrase silence determines when the phrase mode creates a new region. These names and functions are verified against the current Auto Trim/Crop help.
Start conservatively. Preview or work on a copy, especially with breathy speech, reverb tails, soft instrument attacks and noisy archival recordings, because a threshold that strips room tone can take intentional quiet material with it. For one important file, I'd choose manual Trim/Crop, which is often quicker than fixing an aggressive automatic result.
Zoom to the edit, then verify in context
Roll the mouse wheel to zoom horizontally; hold Ctrl while rolling to zoom vertically. With a selection active, Ctrl+Up Arrow zooms to that selection. Use View → Zoom Time → Normal for the default time scale, or View → Zoom Time → Out Full to see the whole file. The Magnify tool lets you drag around the exact area without losing the selection.
At full horizontal zoom Sound Forge can show 24 pixels per sample. That helps with placing an edge, but make the final call by ear at normal scale. The current magnification guide documents the complete zoom set.
Split and trim events without changing the source range
A split works on events and doesn't cut sample data the way a cut does. Select the Event tool, position the cursor, select the event if needed, then choose Edit → Event → Split or press S. With no event selected, Sound Forge splits the events under the cursor across all channels; with events selected, only those get split. Ctrl+Alt+T splits at region boundaries.
With the Event tool active, drag an event edge to trim it. An event can't extend past its underlying media, but dragging the edge back can bring back media the trim only hid. Hold Alt while dragging an event to slip its contents without moving the event, and hold Alt while dragging an edge to slip-trim.
These behaviors are documented in the current Splitting Events and Slipping and Trimming Events pages. They are the right tools when you need adjustable edit boundaries. For a finished single-file crop, the Edit-tool selection plus Ctrl+T remains simpler.
Keep a safe way back
Ctrl+Z reverses the last edit and Ctrl+Shift+Z redoes it. The current Undo guidance says that, when Undo past Save is enabled in General preferences, history remains available after saving only until you close the data window or exit Sound Forge. Save a Sound Forge Pro project when you need undoable edit history after closing and reopening the work.
For irreplaceable recordings, I'd use Save As before any destructive data edit. Undo is handy in the moment, but it's no backup.
Frequently Asked Questions
What is the difference between Cut and Trim/Crop?
Cut removes the selection and copies it to the clipboard. Trim/Crop keeps the selection and removes everything outside it from the selected channel. Use Cut when the selected material should disappear and may be pasted elsewhere; use Trim/Crop when the selection itself is the finished range.
How do I crop audio in Sound Forge Pro?
Select the audio you want to keep, then press Ctrl+T or choose Edit → Trim/Crop. Check the selected channels before applying it to a stereo or multichannel file.
How do I remove silence from the beginning and end?
For one file, select from the intended first sound to the final decay and use Trim/Crop. For repeatable level-based detection, choose Process → Auto Trim/Crop and use Remove edges outside of the selection.
Why does a cut click or pop?
The new join may contain a waveform discontinuity. Use Z or Shift+Z to snap the selection to zero crossings, listen to the join, and add a short fade or event crossfade when snapping alone is not enough.
Can I enter an exact cut time?
Yes. Double-click Selection Start, End or Length in the status bar and type the value in the active time format. Then apply Cut, Delete or Trim/Crop.
Does Trim/Crop always affect every channel?
No. The current documentation says it removes outside data from the selected channel. Select all required channels deliberately when you need one coherent crop across a stereo or multichannel file.
How do I split at the cursor?
Use the Event tool, position the cursor and press S, or choose Edit → Event → Split. This splits events; it is not a separate destructive split command for raw waveform data.
Once the boundaries are clean, decide whether the level needs changing with the normalization guide and create the delivery copy with the MP3 export steps. For repetitive editing, keep the Sound Forge shortcut reference beside the editor instead of relying on legacy key maps.