
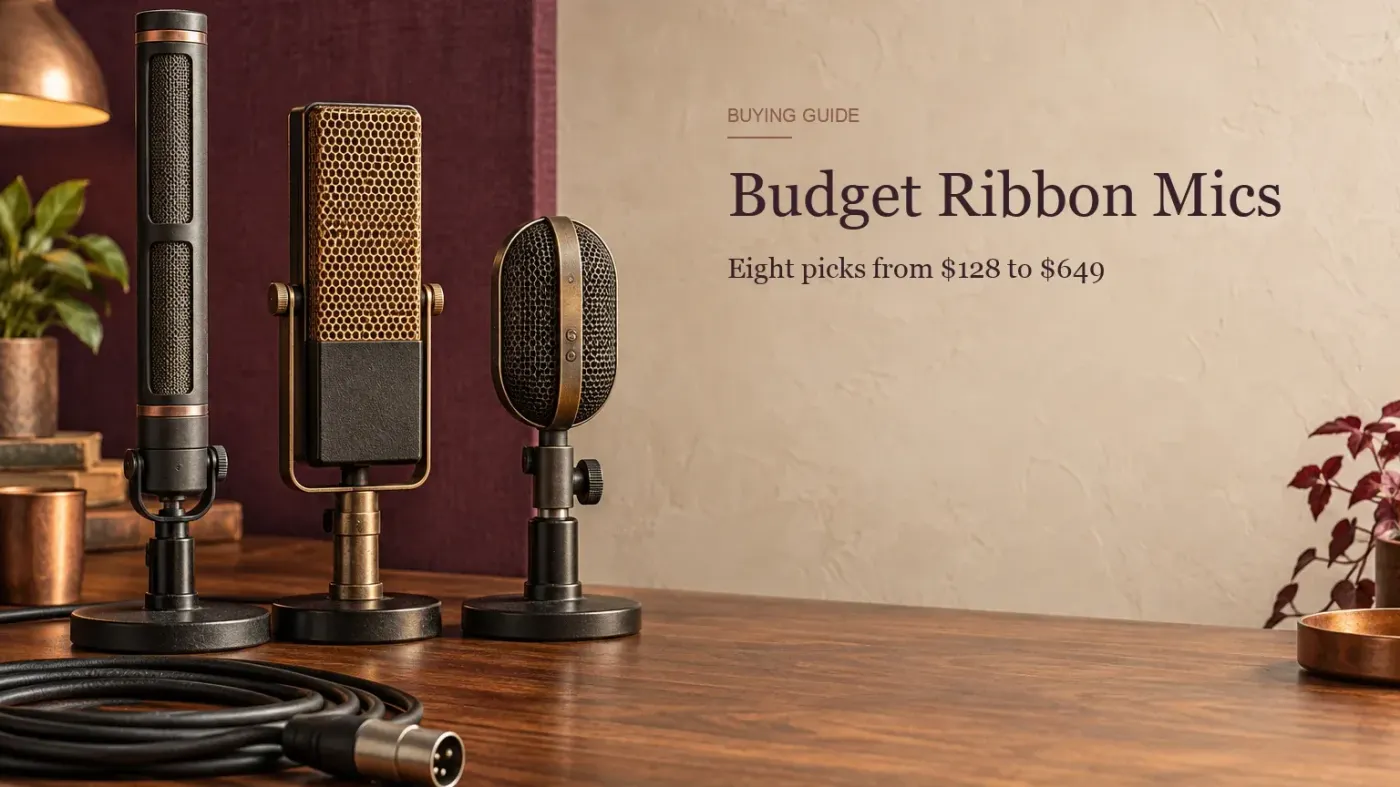
The MXL R144 is the cheapest sensible entry into ribbon microphones in this comparison, while the Golden Age R2 MKII is the stronger passive value below $200 and the R1 Active MKIII is the easier budget match for a modest preamp. If you can spend more, the sE X1 R adds phantom protection, the VR2 provides much higher active output, and the Royer R-10 is the long-term passive step-up. The right choice depends on your preamp, room and source—not price alone.
Price note: all prices below are US advertised prices captured on September 22, 2026. They are a dated comparison, not a promise of current stock or future pricing. The sE VR2 price was a temporary sale when checked.
Budget ribbon microphone comparison
| Model | Price* | Design | Phantom-power rule | Sensitivity / load note | Stated response |
|---|---|---|---|---|---|
| MXL R144 | $128 | Passive | Do not use | -56 dBV; load above 1.5 kΩ | 20 Hz–17 kHz |
| Golden Age R2 MKII | $179 | Passive | Never apply | -50 dB; 1.2 kΩ recommended load | 30 Hz–18 kHz |
| Golden Age R1 Active MKIII | $229 | Active | Required | Buffered output; manufacturer lists no numeric sensitivity | Not listed on manufacturer product page |
| sE X1 R | $249 | Passive | Protected | 1.8 mV/Pa (-55 dBV) | 20 Hz–16 kHz |
| Avantone CR-14 | $279 | Passive dual ribbon | No power needed | -52 dBV; 3 kΩ recommended load | 30 Hz–15 kHz ±3 dB |
| sE VR1 | $409 | Passive | Protected | 1.8 mV/Pa (-55 dBV) | 20 Hz–18 kHz |
| sE VR2 | $419 sale | Active | Required | 14.1 mV/Pa (-37 dBV) | 20 Hz–18 kHz |
| Royer R-10 | $649 | Passive | Conditional | -54 dBV; 700 Ω or higher load | 30 Hz–15 kHz ±3 dB |
*September 22, 2026 US snapshot. A frequency-response range does not tell you how flat or suitable a microphone sounds, so it is not used as a quality score.
The comparison below uses documented specifications, electrical requirements, included hardware and a dated US price snapshot. These sources do not establish how the microphones sound.
1. MXL R144: the lowest-cost introduction
The MXL R144 is the place to start when the goal is to learn how a passive figure-8 ribbon fits your recording chain at the lowest price in this comparison. At $128 in the captured price snapshot, it leaves room in the budget for the part that matters just as much: a quiet preamp or suitable clean-gain stage if your existing interface becomes noisy at high gain.
The current MXL R144 specifications list a passive figure-8 design, -56 dBV sensitivity, 250-ohm output impedance and a recommended load above 1.5 kΩ. That low sensitivity is not a defect, but it tells you why this microphone is a poor impulse purchase for a quiet singer and a noisy interface. The R144 manual warns never to apply power to the microphone and to avoid strong air bursts that can damage its ribbon.
2. Golden Age R2 MKII: best passive value under $200
The Golden Age R2 MKII is my passive value pick below $200. Its documented sensitivity is higher than the R144’s, so it needs less preamp gain for the same source level and distance. Both microphones include a shock mount; the R2’s higher output is the reason I would consider paying the difference between their $128 and $179 price snapshots.
The R2 MKII manual’s specifications give a figure-8 pattern, roughly 3.2 mV/Pa sensitivity, 250-ohm output impedance and a 1.2 kΩ recommended load. The same manual is direct about power: never apply phantom power. I would choose this model only when I can keep 48 V off throughout the session.
3. Golden Age R1 Active MKIII: best inexpensive active ribbon
The R1 Active MKIII is the most affordable active design here. Its internal buffer changes the buying question: instead of demanding the same amount of clean preamp gain as a low-output passive ribbon, it uses 48 V to produce a stronger, more stable output. That can make more sense than buying a cheap passive ribbon and then adding another gain device.
The R1 Active MKIII specification describes an active FET buffer, mandatory 48 V phantom power, a switchable -10 dB pad and a low-cut switch. Golden Age states a 160 dB maximum SPL at 1 kHz and 1% THD. The manufacturer’s product page does not list numeric sensitivity or a full frequency-response specification, so those figures are unavailable for a like-for-like comparison here.
4. sE Electronics X1 R: best protected passive option under $250
The X1 R is the safer passive choice for a busy home studio. It still behaves like a low-output passive ribbon, but sE builds in phantom-power protection. That does not remove the need for careful cabling and gain staging, yet it reduces one common operational risk compared with models whose manuals prohibit phantom power.
The official X1 R page specifies a figure-8 pattern, 1.8 mV/Pa sensitivity, 200-ohm output impedance, a 20 Hz–16 kHz stated response and phantom protection. At $249 in the price snapshot, it is not the cheapest way to get a ribbon. The extra money buys a more forgiving electrical design, not proof that it will suit every source better.
5. Avantone CR-14: best passive package under $300
The CR-14 is the package pick below $300. Avantone includes a shock mount, wooden presentation box and metal road case, which matters if the microphone will move between storage and sessions instead of living permanently on a stand. It uses a dual-ribbon design.
Avantone lists the CR-14 at $279 and specifies a passive figure-8 design, -52 dBV sensitivity, output impedance at or below 600 ohms and a 3 kΩ recommended load on the current CR-14 product page. The 30 Hz–15 kHz ±3 dB stated response should be read as a specification, not a verdict about detail or darkness.
6. sE Electronics VR1: a step-up passive ribbon
The VR1 is the step-up passive option for buyers who want sE’s phantom protection and a stated response extending to 18 kHz. It keeps the familiar passive-ribbon constraint—1.8 mV/Pa sensitivity—so it still belongs with a quiet preamp rather than being treated as a plug-and-forget upgrade.
The VR1 specifications list a figure-8 pattern, 300-ohm output impedance, 20 Hz–18 kHz stated response and a 230 g body. The shared VR1 and VR2 manual separates the models clearly: the VR1 is passive, while the VR2 is active and requires P48. The $409 snapshot places the VR1 above the strict budget tier, so buy it for that documented design fit rather than because a higher price guarantees a preferred sound.
7. sE Electronics VR2: best step-up active choice
The VR2 is the most straightforward electrical match in the group. Its active circuit raises sensitivity to 14.1 mV/Pa, or -37 dBV, which is dramatically higher than the 1.8 mV/Pa specified for the passive X1 R and VR1. That does not make the VR2 automatically better, but it can make the complete recording chain quieter and easier to operate with ordinary interface preamps.
The VR2 product page specifies a figure-8 pattern, 200-ohm output impedance and required P48 phantom power. The $419 captured price was a temporary $100 discount, so treat it as an opportunity observed on September 22, 2026 rather than its permanent market position.
8. Royer R-10: the long-term passive step-up
The Royer R-10 sits outside many definitions of “budget,” but it belongs in this comparison because it shows what the next passive step costs. At $649 in the captured retailer snapshot, it is for someone who has already decided that a passive figure-8 ribbon fits the work and wants a model with extensive manufacturer placement guidance and service support.
The R-10 specifications list -54 dBV sensitivity, 100-ohm output impedance, a recommended load of 700 ohms or greater and a 30 Hz–15 kHz ±3 dB stated response. Royer’s R-10 manual covers proximity effect, rear-lobe polarity, preamp loading and placement around loud sources in more depth than most product pages.
Royer also gives a more nuanced phantom-power rule than “always safe” or “always dangerous.” Its technical guidance on ribbons and phantom power says Royer ribbons are normally unaffected by phantom power, but damaged or miswired cables and phantom-powered patching can damage the ribbon. Royer recommends turning phantom off before connecting or disconnecting its passive microphones; I would also keep it off while repatching.
Active versus passive ribbon microphones
Active and passive ribbons can use similar ribbon motors, but they interact with the rest of the signal chain differently. A passive microphone sends the ribbon transformer’s low-level output directly toward the preamp. An active model adds internal electronics that require power and provide a stronger, less load-sensitive output.
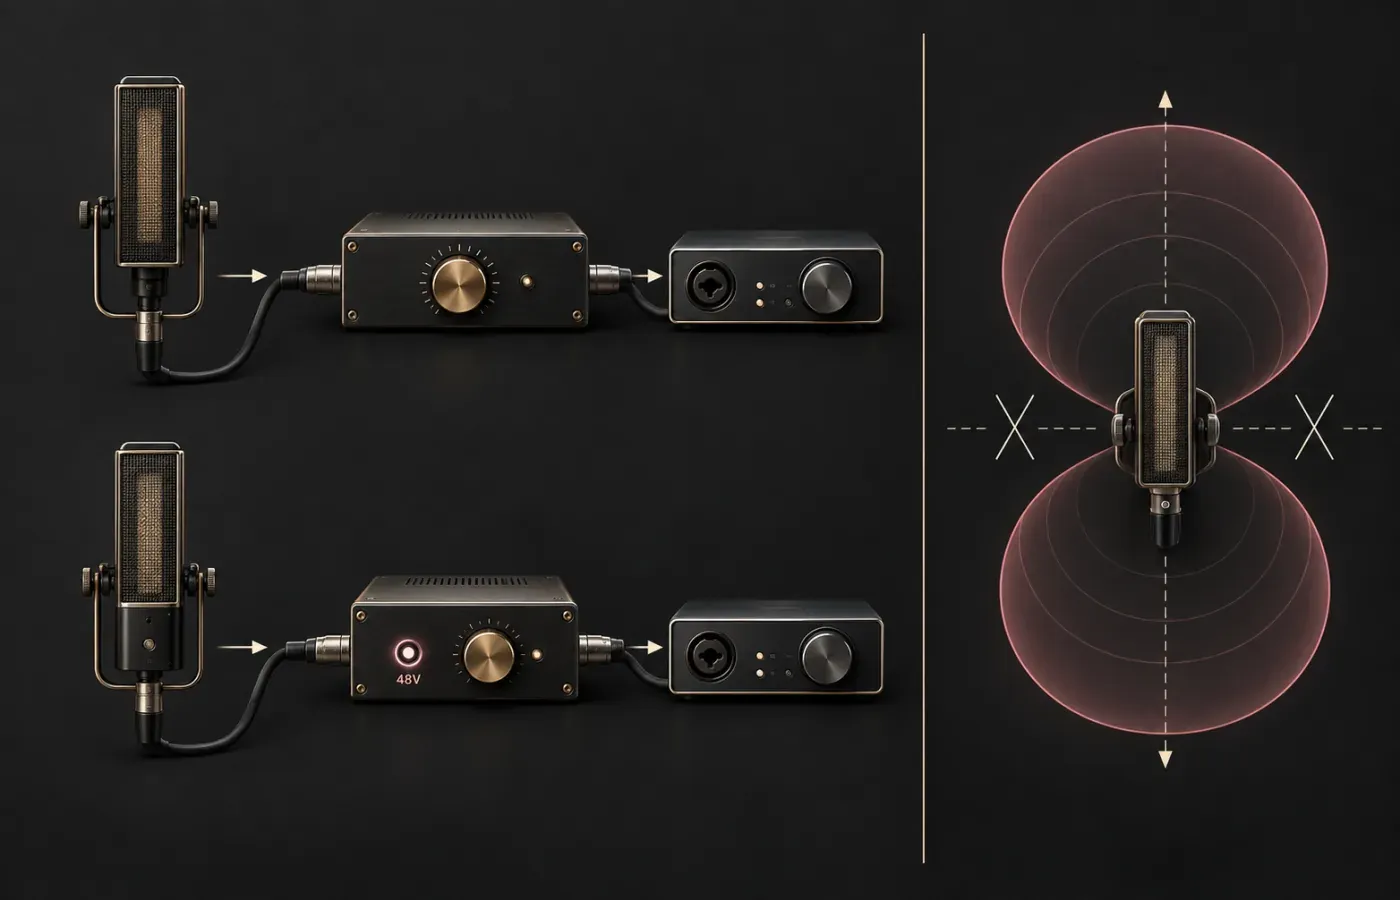
Choose around the preamp
Check sensitivity, the manufacturer’s recommended input load and how noisy your preamp becomes at high gain. Loud guitar cabinets and brass demand less gain than quiet vocals or distant room placement.
Choose around power and headroom
Confirm the exact phantom requirement before connection. A higher output can suit ordinary interfaces, but the active circuit and pad limits still matter on very loud sources.
Do not buy an inline booster automatically. Start with the microphone’s manual, then compare its sensitivity and recommended load with your preamp’s input impedance and available clean gain. An active ribbon may already provide enough output, while a passive model may call for a quieter preamp or a suitable clean-gain stage.
How much preamp gain and input impedance do you need?
There is no honest universal gain number for ribbon microphones. Required gain changes with source level, distance, microphone sensitivity and the noise performance of the preamp. A close guitar cabinet may need little gain; a soft voice at a cautious distance may expose hiss from the same interface.
- Read sensitivity first.A more negative dBV figure indicates lower output. The R144 at -56 dBV and R-10 at -54 dBV will generally ask more of the preamp than the active VR2 at -37 dBV.
- Check the recommended load.MXL recommends above 1.5 kΩ for the R144, Golden Age states 1.2 kΩ for the R2 MKII, Avantone states 3 kΩ for the CR-14, and Royer specifies 700 Ω or higher for the R-10.
- Listen for preamp noise before buying another device.Connect correctly with phantom set for that model, raise gain for the intended source and judge whether hiss becomes intrusive at the working level.
- Match the fix to the problem.If gain noise is the limitation, an active ribbon or suitable clean-gain stage may help. If room pickup or air movement is the problem, more gain hardware will not fix it.
Phantom power: required, protected, conditional or prohibited
The usual warning that “phantom power kills ribbon microphones” is too broad to guide a real setup. The safe instruction is model-specific. Some active ribbons require 48 V, some passive ribbons include protection, Royer permits properly wired balanced phantom systems under stated conditions, and two inexpensive models here explicitly prohibit it.
| Rule | Models | What to do |
|---|---|---|
| 48 V required | Golden Age R1 Active MKIII; sE VR2 | With phantom disabled and gain down, allow any previously active phantom supply to discharge before connecting the microphone using a known-good balanced cable. Then enable the required P48 supply. |
| Phantom-protected | sE X1 R; sE VR1 | No power is needed, but protection reduces the risk of an accidental correctly wired supply. |
| Permitted with conditions | Royer R-10 | Use a properly wired balanced cable. Turn phantom off before connecting, disconnecting or using a patchbay. |
| Prohibited by manual | MXL R144; Golden Age R2 MKII | Keep phantom power off. Do not assume another manufacturer’s protection applies. |
| No power specified | Avantone CR-14 | The microphone is passive and needs no power. Follow the current manufacturer documentation and use cautious connection practice. |
For any passive ribbon, turn phantom off and lower the preamp gain before touching the connection. If phantom was active, allow the supply to discharge before connecting or disconnecting the mic; follow your preamp or interface maker’s shutdown guidance rather than assuming a universal delay. Then connect a known-good balanced XLR cable and raise gain. Avoid hot-patching through a phantom-powered patchbay.
Figure-8 placement changes the room you record
Seven models in this shortlist have a manufacturer-documented figure-8 pattern. The current manufacturer page for the R1 Active MKIII identifies it as a ribbon microphone but does not state the pattern in its visible specification, so verify the latest manual before planning around side rejection. A figure-8 microphone hears from the front and rear while rejecting sound near its sides. The deep side nulls are useful, but the open rear lobe means the room behind the microphone remains part of the recording.
Aim the marked side at the source
Start on axis, then rotate or move the microphone rather than reaching for EQ immediately.
Choose what the microphone faces behind it
A hard wall close to the rear lobe can return early reflections. More distance or absorption behind the microphone changes that contribution.
Point the side at unwanted sound
Rotate the microphone so a nearby monitor, cymbal or other source sits near 90 degrees to the ribbon.
Use proximity effect deliberately
Moving close increases bass on a pressure-gradient figure-8 microphone. Backing away reduces that rise and increases room contribution.
The rear lobe also has opposite polarity to the front on the R-10, as Royer documents. That matters when combining the ribbon with another microphone: change distance and check the summed result rather than assuming the two signals will align because both capsules face the source.
Protect the ribbon from air movement
A ribbon can handle high sound pressure while still being vulnerable to a strong blast of air. SPL and wind are different problems. A kick-drum port, an uncovered vocal plosive, compressed-air cleaning or fast movement of the microphone can stress the ribbon even when the musical level looks acceptable on paper.
- Use a pop filter for close vocals. Set enough distance that the filter disperses the air pulse before it reaches the ribbon.
- Stay away from ports and wind sources. Place a ribbon beside or at a safe distance from a kick port rather than directly in the jet of air.
- Move the microphone slowly. Do not swing it across a room or blow into it to test whether it is connected.
- Lower gain before connecting. Follow the exact phantom-power rule for the model and use a known-good balanced cable.
- Store it protected. Use the supplied box, bag or case and keep the microphone away from dust, moisture and accidental impact.
Which budget ribbon microphone should you buy?
Choose the MXL R144. Keep 48 V off and budget for a pop filter and stable stand.
Choose the Golden Age R2 MKII. Its strict no-phantom rule makes careful session practice essential.
Choose the Golden Age R1 Active MKIII. The active buffer is more useful than chasing a cheap passive microphone plus uncertain extra gain.
Choose the sE X1 R for a protected passive design, or the active VR2 when stronger output is the priority.
Choose the Avantone CR-14. Its case, box and shock mount make the package easier to move and store responsibly.
Compare the sE VR1 and Royer R-10 around preamp load, service expectations and total budget. Do not spend $649 while leaving the stand, cable or gain chain unresolved.
For most first-time buyers, the decisive question is not “which ribbon is best?” It is “which ribbon fits the system I already own?” Start with the power rule, preamp and room. Once those three fit, source placement becomes a useful creative choice instead of a troubleshooting exercise.